Major spoilers ahead

Endacopia Endings

Endacopia has three main community-documented endings: A, B, and C. The route summaries below contain late-game spoilers, so open only the ending you are trying to reach.

Before you start

Save Before Chapter II

Steam confirms the ending-related achievements Escape, Return, and Stay, but does not publish their trigger conditions. The route information below comes from independent Neoseeker and Fandom guides; it is presented as community guidance, not as an official route manual.

Community route

Ending A

Key choice: Toy Hand Saw

Ending A route reference
Show Ending A route spoilers
  1. In Chapter II, give the Toy Hand Saw to the Toilet.
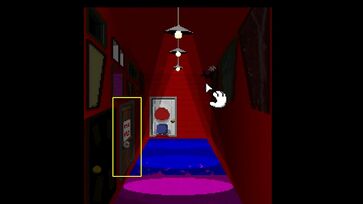
  2. After the location bosses are resolved, leave the bathroom and enter the “Do Not Enter” door in the hallway.
  3. Open the doors along the path to the cliff, inspect the hole above, and follow Tip’s plan to climb through it.
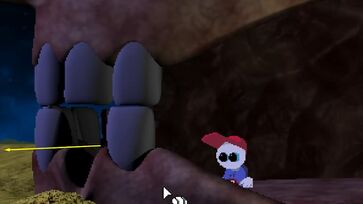
  4. In the mouth room, take the right-hand door and defeat Henry. Neoseeker describes the uvula as the target during the fight.
  5. In the new house, speak to the characters if you wish, then use the lamp by the fireplace and choose Turn Light Off.

Community route

Ending B

Key choice: Real Hand Saw

Ending B route reference
Show Ending B route spoilers
  1. In Chapter II, give the Real Hand Saw to the Toilet.
  2. Return to the Chapter III hallway and take the “Do Not Enter” door, then follow the path to the cliff and climb through the hole.
  3. In the mouth room, use the missing tooth opening rather than the route used for Ending A.
  4. Continue left to the house, inspect the bathroom, then keep moving through the desert to the next house.
  5. Speak to the family there. Upstairs, talk to Mellow’s little sister and agree to tell her a bedtime story.

Community route · most complex

Ending C

Community sources disagree on some Ending C prerequisites.

Ending C route reference

Neoseeker’s checklist: do not fight Clocky in the Prologue, give the Toy Hand Saw to the Toilet, complete the three location secrets, and fight the main bosses.

Fandom’s checklist: Clocky and the saw choice do not matter; instead, bring Timesville, Misery Town, and The Offices to their boss thresholds before completing the location secrets.

Show the Ending C final-route spoilers
  1. Complete the required secret content in Timesville, Misery Town, and The Offices according to the community checklist you are following.
  2. Continue to the Chapter III house sequence. Neoseeker directs you from the bathroom to the computer room; Fandom directs you back to Mellow’s room after the final ascent.
  3. Both accounts then describe a Clocky encounter and a passage through a wall opening or hole to the Surgeon’s area.
  4. Read the book, speak to the Surgeon if you want the lore prompts, then end the conversation to trigger the Ending C sequence and the Stay achievement.

The two sources agree on the three-area secret requirement and the Surgeon final sequence, but not every prerequisite. Keep a separate save before committing to this route.

After all three endings

The Yeti Secret

Both community sources describe an additional scene after completing A, B, and C: meeting Andyl4nd and starting a dance minigame. Steam lists The Yeti as an achievement, but not its trigger route. Treat the scene instructions as community guidance.

Sources and Verification